Hagon Installation Instructions


Fork Springs
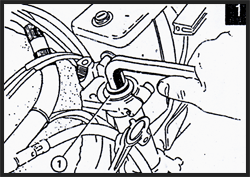 |
Warning: Support the motorcycle while dismantling forks. Remove the retainer. This Retainer is under pressure from spring. Take care when removing fork caps. |
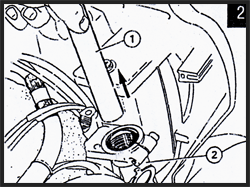 |
Remove any spacers. |
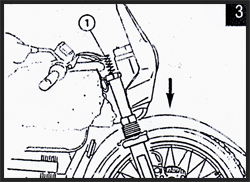 |
Making sure the motorcycle is supported, carefully allow the forks to fully compress (bottom out) so the suspension is as short as possible. |
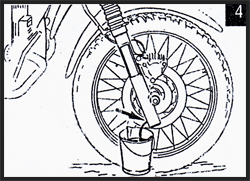 |
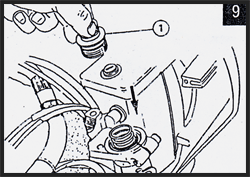
Remove oil drain screws from both legs and allow oil to drain. Pump the forks to ensure all oil is drained. Where no drain screws are used, the forks will have to be removed and dismantled, refer to workshop manual. |
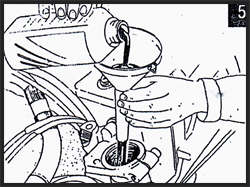 |
With the suspension still fully compressed, fill each leg so that the oil level is approximately 300mm from the top of the fork legs. Pump the forks up and down 15-20 times to clear any air out of the system. |
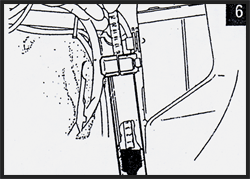 |
Using a rule measure the correct air gap level from the top of the fork tube. The level is on the sticker and box end and on the invoice. Fill each fork tube with oil to the measured air gap level. |
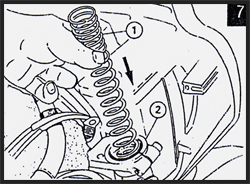 |
Fully extend legs to end of travel and replace springs with the tight coils to the top. |
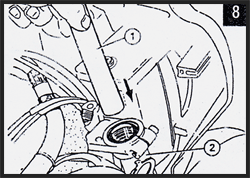 |
If the springs protude above the fork tubes with the fork legs extended, Do Not refit original spacers (if fitted). |
 |
Refit fork cap/retainers as per manufacturers' settings. |
Shock Absorbers
Your Hagon product will give long and reliable service if fitted correctly.
Hagon Shock Absorbers have a wide load carrying range and will be delivered with the spring pre-load set for an average weight rider (75-100Kg). Before fitting the new shock absorber to the bike, please ensure that the swinging arm and any linkages are lubricated, move freely and are without excessive play.
The fitting of any Hagon Shock absorber should be carried out by a professional and the fixing bolts and nuts should be tightened correctly using locking fluid where necessary. All fasteners should be set to the original manufacturer's torque settings.
Important: Fit the Hagon shock absorber with the Logo or Part Number label up the correct way. Before fitting check the bushes match the size of the bushes on the existing shock absorber. After fitting, make sure all wires, cables or pipes are clear of the suspension unit.
WARNING: Your Hagon Shock is pressurised and should not be dismantled.
Mono-Shock Absorber Spring Pre-load Adjustment
Spring adjustment for heavier riders, or for carrying passengers, (increasing the spring pre-load). This is best done with the shock absorber removed from the bike. Adjust the pre-load - with the castellated adjuster ring uppermost. Release the adjuster ring locking grub screw and then rotate the adjuster ring clockwise to increase the pre-load by one complete turn at a time.
Do not exceed six rotations from the point at which the shock absorber was supplied or the spring may become coil bound. Once you have completed the adjustment, retighten the locking grub screw in the adjuster ring, do not over tighten as the lock screw is plastic tipped.
For the Optional Remote Pre-load Adjustment Mono-Shocks
Turn the HYDRAULIC PUMP HANDLE clockwise to increase the spring pre-load for heavier riders or luggage.
Turn clockwise to harden and anti-clockwise to soften the ride.
When adjusting the damping to a softer seating, the unit must be worked, e.g. the bike should be ridden for a few miles, before the adjustment will take effect. Firm resistance will be felt at the extremes of the adjustment, just back off the screw one turn once this resistance is felt. Do not use force on this adjuster screw.
Important - Twin Shock Information
Hagon Twin Shocks: Shock absorbers must be fitted as balanced pairs - do not replace only one shock absorber.
When fitting - please ensure the following:
The unit are the correct way up - the Hagon Logo should read the right way up - some shock absorbers should be fitted rod-down.
All twin shocks should be fitted with washers larger than the rubber brushes for added security. Also ensure shock absorbers have clearance throughout their full stroke.
Spring Adjustment
Hagon Twin Shocks with 3 position preload adjusters are supplied set at their softest setting. A spanner/wrench is provided to adjust for extra loads if required. Only adjust with the shock absorbers mounted on the motorcycle. Do ensure that the supplied 'C' spanner/wrench is safely engaged and keep your free hand away from the unit when you are making an adjustment. Adjust both shock absorbers by the same amount.
Damping Adjustment for the 2810
The 2810 is supplied with a finger adjustable ten position damper control. Your shock absorber is supplied with its damper setting set to its mid point of adjustment.
Spring Adjustments for Nitro Shocks
Spring adjustment for heavier riders, or for carrying passengers, (increasing the spring pre-load) Adjust the pre-load - with the castellated adjuster ring uppermost. Release the adjuster ring locking grub screw and then rotate the adjuster ring clockwise to increase the pre-load by one complete turn at a time. Do not exceed six rotations from the point at which the shock absorber was supplied or the spring may become coil bound.
Once you have completed the adjustment, retighten the locking grub screw in the adjuster ring, do not over tighten as the lock screw is plastic tipped.
Damping Adjustment for Nitro Shocks
These Shocks are supplied with a finger adjustable ten position damper control when adjusting the damping to a softer setting, the unit must be worked, e.g. the bike should be ridden for a few miles, before the adjustment will take effect. Your shock absorber is supplied with its damper setting set to its mid point of adjustment.
IMPORTANT: Ensure any adjustments are the same on both shocks
